Wie registriere ich eine Zweigstelle
Step 1
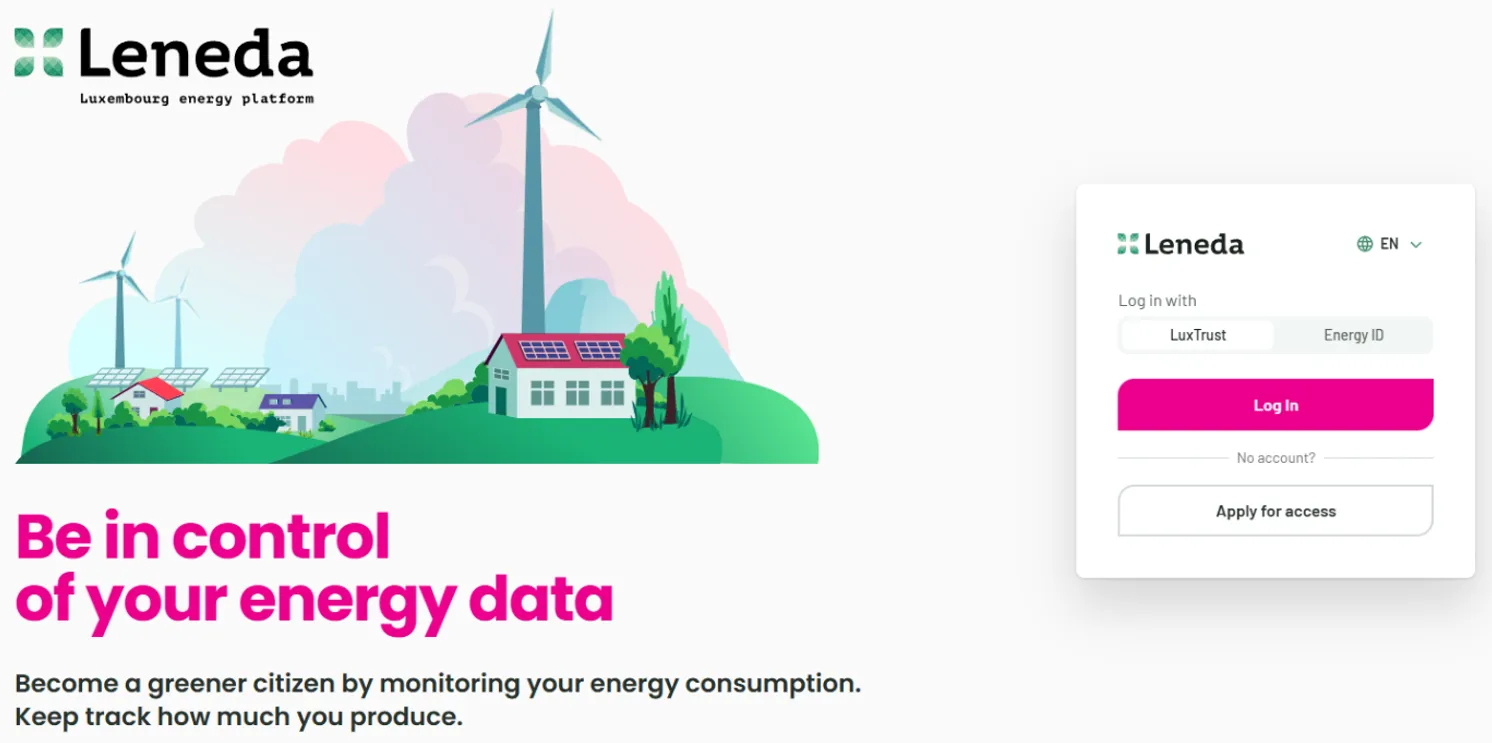
Open the web page “app.leneda.eu” in your browser. First, you need to log in and select the company with which you want to onboard a new company.
Step 2
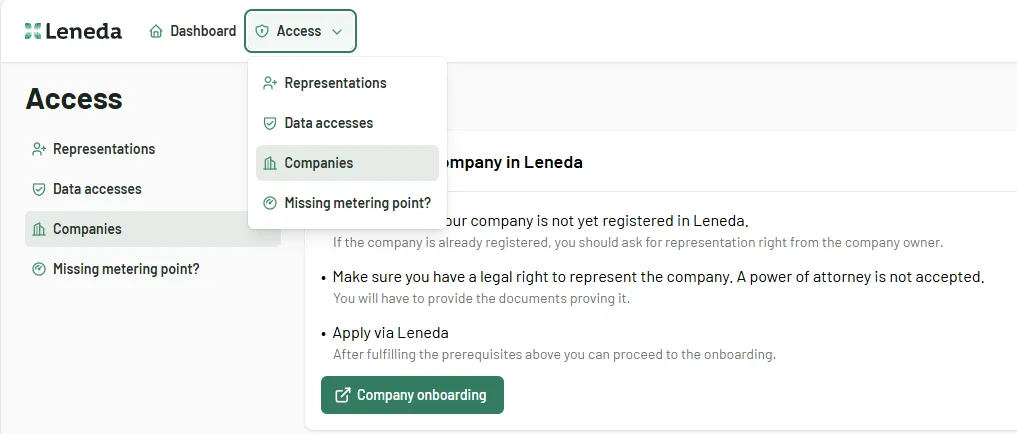
In this step, you need to select “Access” and then “Companies.” From here, you can start the Company Branch Onboarding process.
Step 3
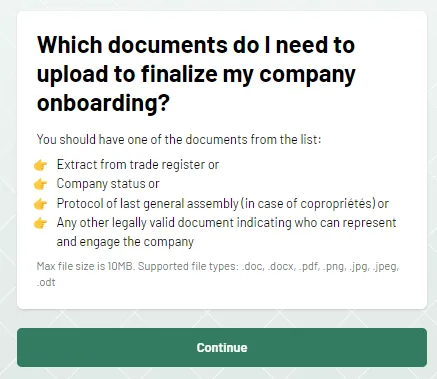
Leneda will tell you which documents you will need to upload at the end of the onboarding process to make sure that the submission can be accepted.
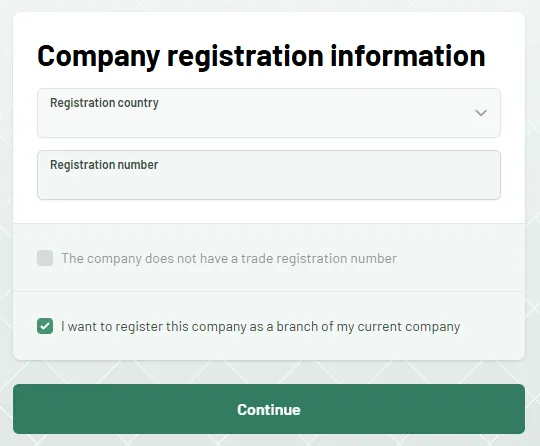
Step 4
On this screen, you only need to select the second box for a branch onboarding. Then, click “Continue”.
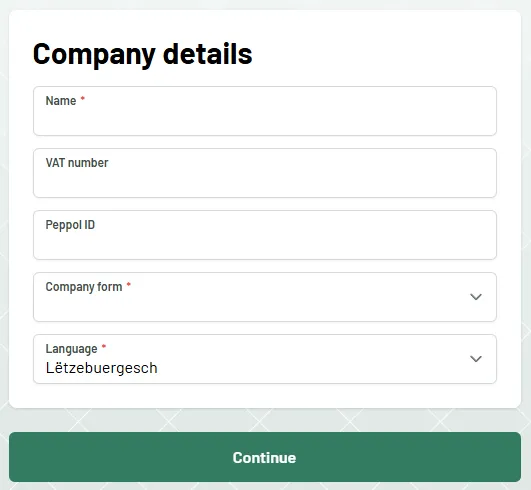
Step 5
In the next step, we need a few additional details from you:
- Name
- VAT number (if applicable)
- Peppol ID (if applicable)
- Company form
- Language (which language would you like Leneda to communicate with you in?)
Then, click “Continue”.
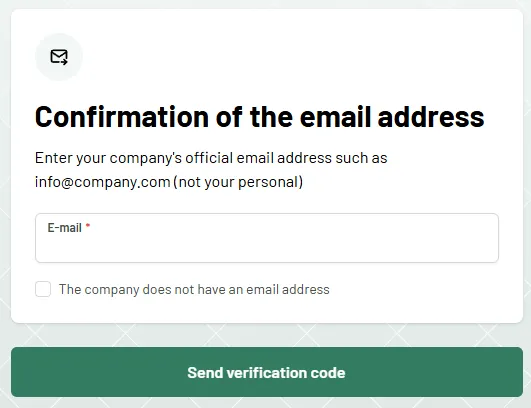
Step 6
Now we need to know how we should communicate with your company. In a first step, you need to provide the general email address of your company (such as info@company.com), which you will need to verify. After entering the email address, you should click “Send verification code.”
We will send a unique code (OTP) to the email address you provided to ensure you have access to it.
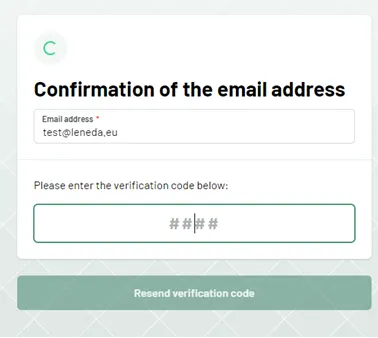
Step 7
Enter the verification code that was sent to the provided email address. If there was a typo in the provided email address or if you accidentally typed the wrong address, you can correct it and ask for a new verification code. And of course, you can later change the email address in the system.
Step 8
After the verification of the e-mail address, we need a phone number. You can choose between a mobile phone number or a landline number.
- Mobile phone: After entering your mobile phone number click to “Send verification code”, and Leneda will send another unique code via SMS to the provided mobile phone number.
- Landline: After providing the landline number you can click “Continue” and skip the next step.

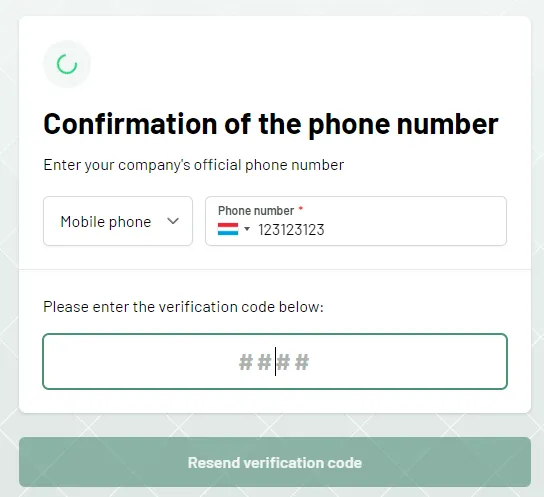
Step 9
Enter the verification code that was sent to the provided mobile phone number. If there was a typo in the indicated mobile phone number or if you accidentally typed the wrong phone number, you could correct it and ask for a new verification code. You can also switch back to landline number. After entering the correct verification code, the system will proceed to the next step.
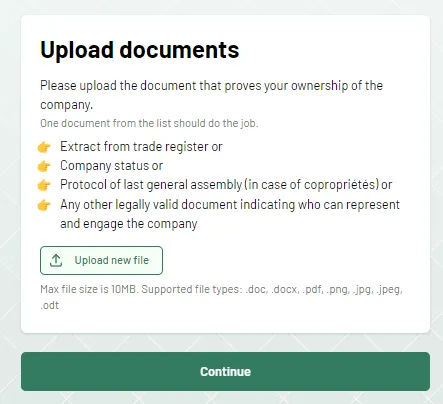
Step 10
In this step, you will be asked to upload the following documents:
- Extract from trade register
- Company status
- Any other legally valid document indicating who can represent and engage the company
After uploading these documents, click “Continue”.
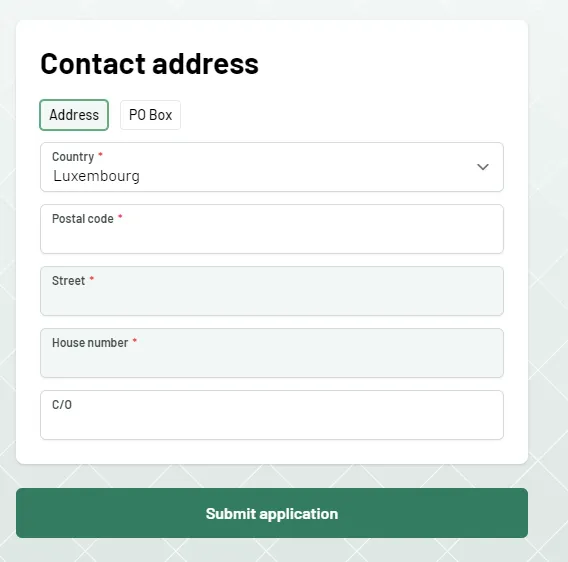
Step 11
In this step, we ask you to provide a contact address. You can choose between a normal address or a PO Box address. All of the fields that include a red mark are mandatory fields. When you are done with the entry of your address, you can click on “Submit application”.
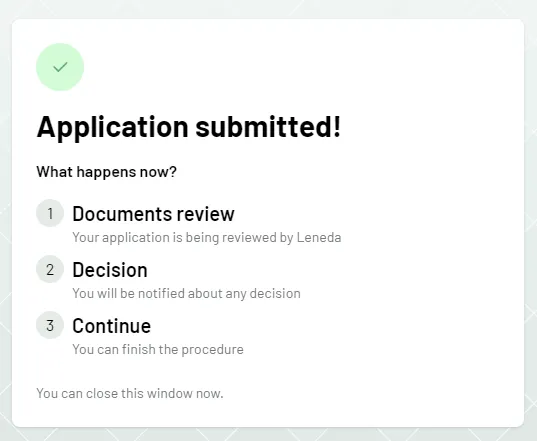
Step 12
You have completed the onboarding process for the company in Leneda. We will now review the submitted data. You will be notified when the onboarding process is complete or if any data is missing. This review can take up to 5 business days. This window can be closed.
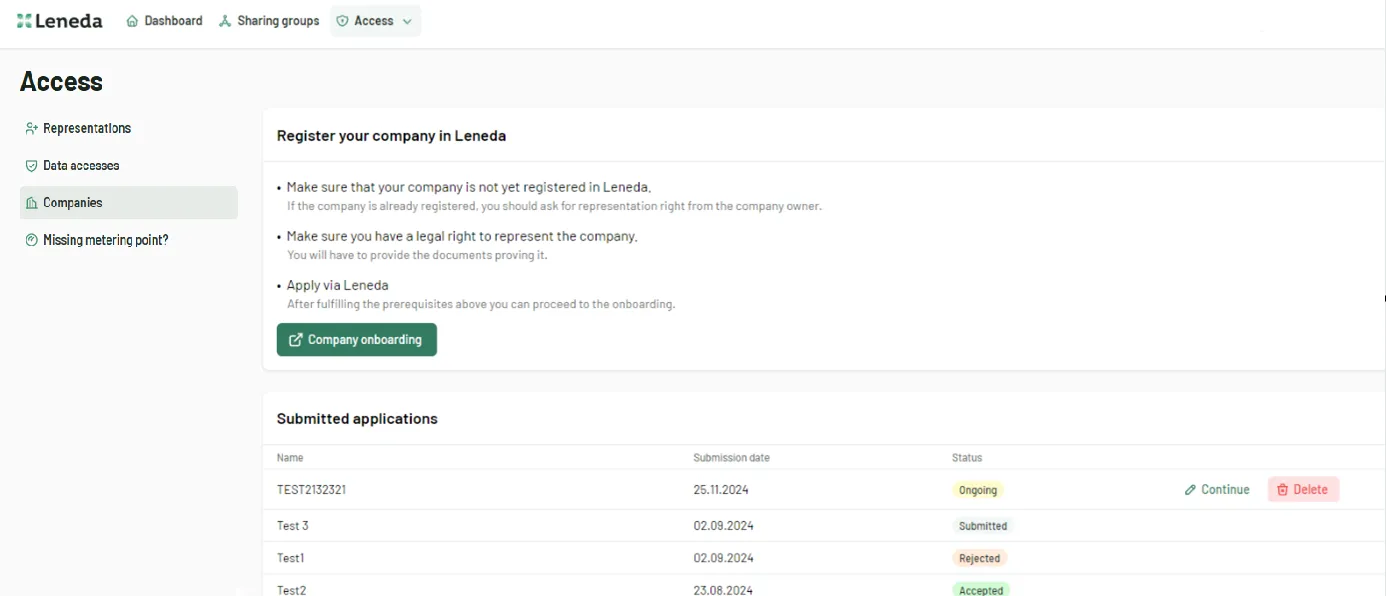
Step 13
On your “Corporate access” Dashboard you will see your submitted applications. For every status change, you will be informed by email. The statuses can be:
- Accepted: Your request has been accepted, and you will receive the Energy ID for your company.
- Rejected: Your request is not validated. You received a mail with the rejection reason. Please contact your grid operator.
- Submitted: Your request is still being processed.
- Ongoing: Your request is still ongoing and not been sent for validation. In this status you can still modify your request by clicking “Continue” or removing by clicking “Delete”.